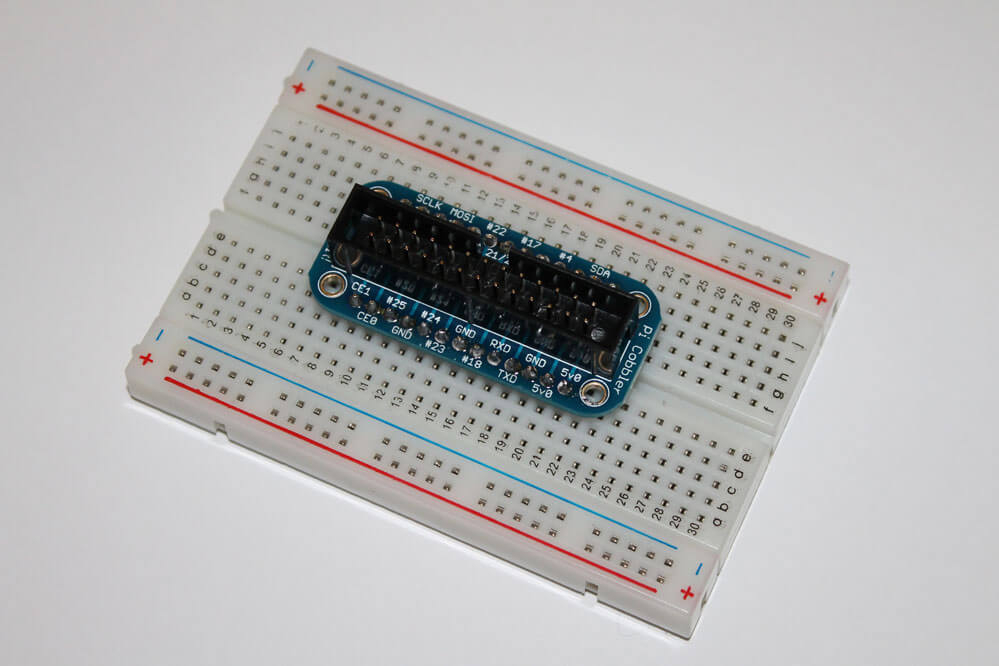
 When using the GPIO I would recommend getting a breadboard and an Adafruit Pi Cobbler Breakout Kit (available from modmypi). This will allow you to easily connect the Raspberry Pi to a breadboard so you can quickly and easily build circuits. The Cobbler is a kit and does require a small amount of soldering.
 I'll start by connecting up a single LED light without any python at all, we will use the same circuit as before but use the Raspberry Pi as the power source.
The circuit will look something like this: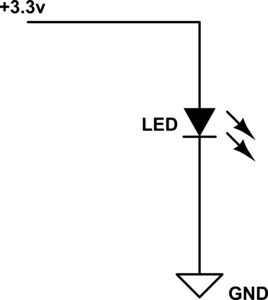
CAUTION: This circuit assumes you're using a 3 volt LED, if you are using a different voltage LED you may need a resistor to stop the LED burning out.
To create this circuit on the breadboard, plug your the long leg on your LED into the + bar on the edge of the breadboard and the short leg of the LED into the - bar. Then looking at the Cobbler, find the pin labeled 3v3, this pin has a constant voltage of 3.3 volts. Connect a wire between a hole in the same row as this pin and a hole in the + bar on the same side as the LED. Next find a pin on the Cobbler labeled GND this is a ground pin. Connect a hole in this row to the - bar on the same side as the LED.
If you then connect the ribbon cable from the Raspberry Pi to the Cobbler, the LED should light up.
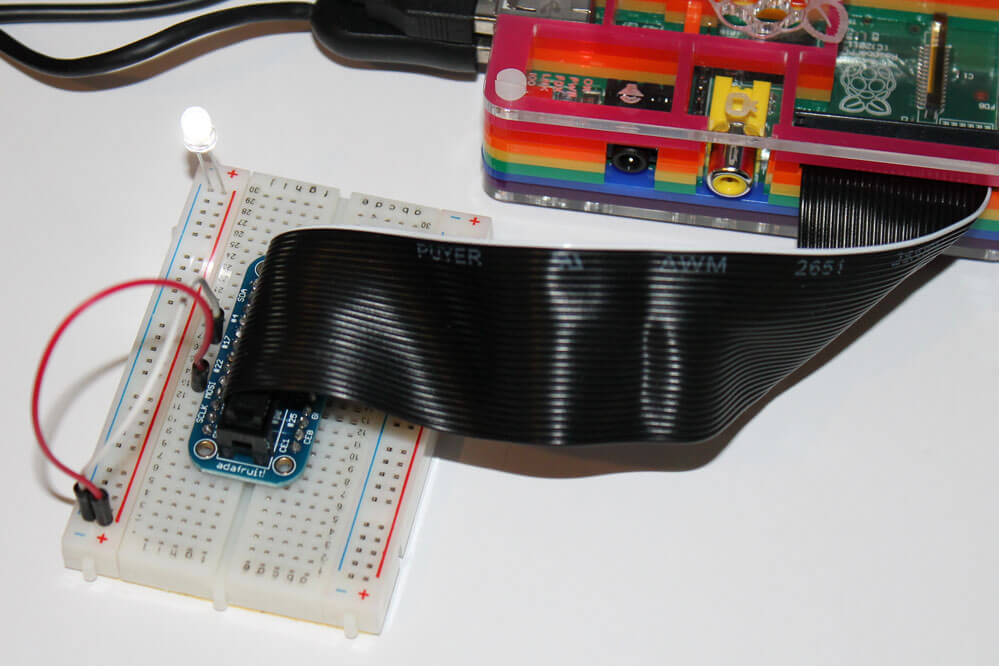
You have now successfully connected the LED to the Raspberry Pi, using a breadboard and the GPIO pins. Next we'll look at controlling it using Python.
DISCLAIMER: Incorrectly using the GPIO pins on your Raspberry Pi can cause damage to the Raspberry Pi, anything plugged into it, or you! I accept no responsibility for any damage caused using the code or instructions above.