As you probably know it's easy to connect the Raspberry Pi to the internet using a network cable as it comes with a network connector built in. You just plug a cable into the connector on the Raspberry Pi and plug the other end into your router and it works. But how do you connect it to a wireless network?
First you'll need a USB wireless adapter, which will work with Linux. I got mine from The Pi Hut (http://www.thepihut.com) as it specifically said it works with the Raspberry Pi.
 Once you have the adapter, plug it into the Raspberry Pi and switch it on. When you have booted into Raspbian, double click on the Wi-Fi Config icon which is on the desktop:
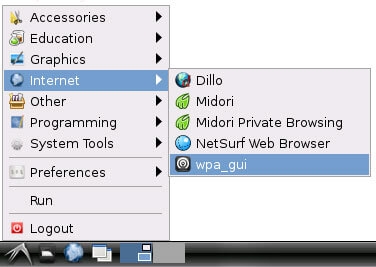
If it's not on the desktop, you can find the same program in the Main Menu. Click on the main menu button in the bottom left of the screen, then hover over Internet. The program you want is the one at the bottom of the list called wpa_gui.
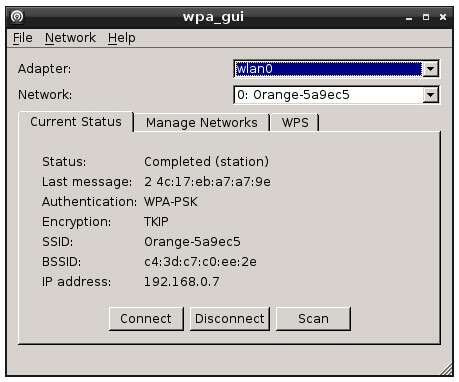
The following window will open, click on the Scan button to search for the available wireless networks which are in range.
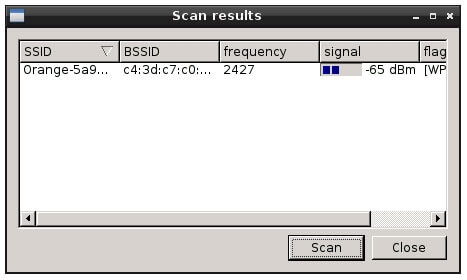
The next window will open and list any wireless access points that have been found. When your network is shown, double click on the name (SSID) in the window.
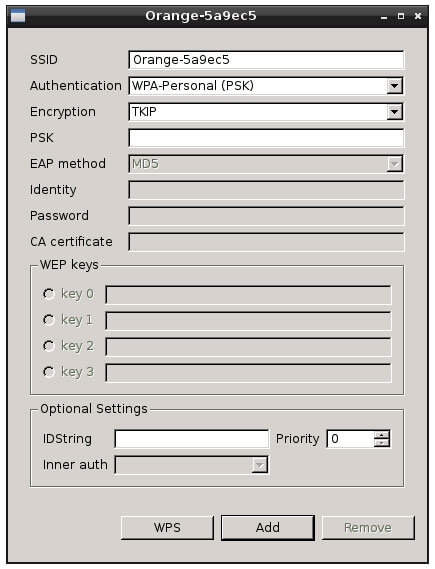
Another window will open, letting you change the security settings for your network. You can probably leave most of them as they are. You will need to enter your wireless network password in the PSK box. Once you have done this click the Add button and you should be connected to the network.