So you want to start using the GPIO and connecting your Raspberry Pi to a breadboard to turn on some LEDs or power some motors etc. But what exactly is a breadboard and how does it work?
A breadboard (plugboard, breakout board, protoboard or prototyping board) is a plastic board with lots of holes in. It allows you to build a circuit quickly and easily without having to do any soldering. It is also reusable so if you make a mistake and something doesn't work it's easy to rectify.
To attach things to the board, you just poke a piece of wire or a connection on a component into a hole on the board. The board is split into 4 areas, a thin strip of 2 columns of holes on each side with 2 larger areas of holes in the middle. They usually have columns identified by letters and rows identified by numbers.
The holes are connected together in the pattern shown in the picture below.

To show how the breadboard is used, I'm going to make a simple LED circuit using the following components:
- 1x Breadboard
- 1x LED (3v)
- 1x Battery (3v)
- 4x Wires
The circuit will be wired as shown in the circuit diagram below:
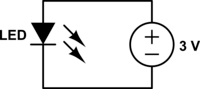
To do this, connect the Battery + to the + bar on the breadboard and the - to the - bar on the breadboard, then noting the short/long sides of the LED wire it up as follows - put the short side of the LED into C1 on the breadboard and the long side into C2, then wire D1 to the - bar and D2 to the + bar
The LED should now light up: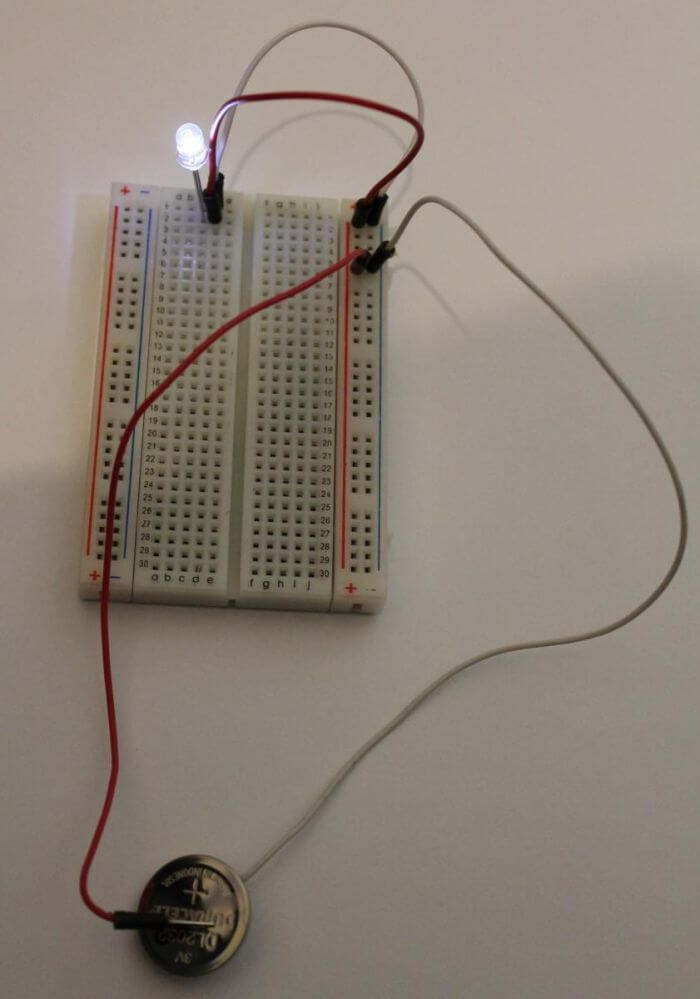
This is because C1 is connected to D1 internally and C2 is connected to D2 internally so the circuit is complete.
Obviously this is a very simple circuit and you could easily make the LED light up by connecting it straight to the battery. But if I.d done that it wouldn't have shown how the breadboard works.
Next I'll look at how to connect the breadboard to the Raspberry Pi and use that as the powers source and a switch to turn the light on and off.